
When it comes to managing resources on a Linux server, one important aspect to consider is user quota. User quota allows you to limit the amount of disk space and number of files that a user can utilize on the system. By setting up and monitoring user quota, you can prevent users from monopolizing resources and ensure fair resource allocation.
In this step-by-step guide, we will walk you through the process of checking user quota in Linux. We will cover two popular methods: using the command line and using a graphical user interface (GUI).
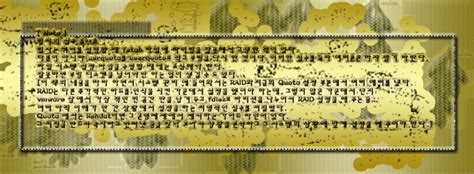
To check user quota using the command line, you can utilize the quota command. This command provides a summary of disk usage and limits for each user on the system. By running the command with appropriate options, you can view detailed information about the disk space and file usage of a specific user or all users on the system.
Note: To use the quota command, you must have administrative privileges on the system.
An alternative method to check user quota in Linux is by using a graphical user interface (GUI) tool such as Webmin. Webmin provides a web-based interface that allows you to manage various system settings, including user quota. With Webmin, you can easily view and configure user quota settings, as well as track and monitor disk usage for individual users.
By following this guide, you will be able to effectively check user quota in Linux and ensure efficient resource management on your server. Whether you prefer using the command line or a GUI tool, understanding and monitoring user quota is essential for maintaining a well-balanced and optimized system.
Step 1: Accessing the Terminal
To check user quotas in Linux, you need to access the terminal. The terminal is a command-line interface that allows you to interact with the operating system using text commands.
Here are the steps to access the terminal:
- Open the “Terminal” application on your Linux system.
- If you cannot find the “Terminal” application, you can usually open it by pressing the “Ctrl+Alt+T” shortcut on your keyboard.
- Once the terminal is open, you will see a command prompt indicating that it is ready to accept commands.
The terminal provides a powerful and flexible way to perform various tasks on your Linux system, including checking user quotas. By accessing the terminal, you can run commands to gather information about the user quotas on your system.
Step 2: Checking the Quota Usage for a Specific User
Once you have enabled quotas and set the limits for users, you can check the quota usage for a specific user on your Linux system. Follow the steps below:
- Open a terminal or SSH into your Linux server.
- Switch to the root user or a user with sudo privileges.
- Run the following command to check the quota usage for a specific user:
| Command | Description |
|---|---|
| quota | Displays the disk usage and limits for all users on the system. |
| quota -u <username> | Displays the disk usage and limits for a specific user. |
Replace <username> with the username of the user you want to check.
The output of the command will show the disk usage and limits for the specified user. It will include information such as the number of files, disk space used, and the soft and hard limits set for the user.
By checking the quota usage for specific users, you can keep track of their disk usage and ensure that they do not exceed the allocated limits.
Step 3: Understanding the Quota Report
Once you have generated a quota report for a specific user in Linux, you will need to understand how to interpret the information provided. The quota report contains several important details regarding the user’s disk usage and limits.
The quota report typically includes the following information:
- Filesystem: This indicates the filesystem for which the quota report is generated. It can be useful when dealing with multiple filesystems.
- User: This displays the username or UID for which the quota report is generated. It helps identify the specific user’s disk usage and limits.
- Usage: This shows the current disk usage for the user, including the number of files and blocks used. It provides an overview of how much disk space the user is utilizing.
- Limit: This indicates the disk space limit set for the user. If the user exceeds this limit, they may face restrictions in creating or modifying files.
- Grace: This displays the grace period provided to the user after reaching their disk space limit. During this grace period, the user can still create and modify files without any restrictions.
- Time: This displays the timestamp of when the quota report was generated. It helps track when the report was last refreshed.
By understanding the quota report’s details, you can quickly assess a user’s disk usage and determine if they are approaching or exceeding their allocated limits. This information is valuable for managing user quotas and ensuring efficient disk space utilization.
Now that you have a good understanding of the quota report, let’s move on to the next step to learn how to modify user quotas if needed.
Step 4: Checking the Quota Usage for All Users
To check the quota usage for all users on your Linux system, follow these steps:
-
Open a terminal or login to your Linux system through SSH.
-
Run the command sudo repquota -a to display the disk usage and limits for all users on all filesystems.
-
The output will include a table with the following columns:
- Mountpoint: the filesystem mount point
- User: the username of the user
- Block grace: the grace period for blocks
- Blocks: the number of blocks used
- Soft limit: the soft limit for blocks
- Hard limit: the hard limit for blocks
- Inode grace: the grace period for inodes
- Inodes: the number of inodes used
- Soft limit: the soft limit for inodes
- Hard limit: the hard limit for inodes
-
Review the output to see the quota usage for each user and filesystem. Pay attention to the “Blocks” column, which indicates the amount of disk space used in blocks.
By following these steps, you can easily check the quota usage for all users on your Linux system, allowing you to monitor and manage disk space more effectively.
Step 5: Setting User Quota Limits
Once you have enabled and configured user quotas on your Linux system, the next step is to set quota limits for individual users. This will ensure that each user has a specific amount of disk space allocated to them, and they cannot exceed that limit.
To set user quota limits, follow these steps:
- First, identify the user for whom you want to set quota limits. You can use the id command to find the user’s ID.
- Once you have the user’s ID, use the edquota command followed by the username or ID to open the quota editor for that user. For example, if the user’s username is “john”, you can run the command edquota john.
- In the quota editor, you will see the current quota limits for the user. These include the hard limit, soft limit, and grace period. The hard limit is the maximum amount of disk space the user can use, while the soft limit is a warning threshold. The grace period is the time period before the soft limit becomes a hard limit.
- To set the quota limits, modify the values in the editor. You can either enter the limits in kilobytes or use shorthand notations such as “K” for kilobytes, “M” for megabytes, or “G” for gigabytes. For example, to set a hard limit of 1 gigabyte and a soft limit of 900 megabytes, you can enter “1G” and “900M”, respectively.
- Save the changes and exit the editor. The quota limits will now be set for the user.
It is important to note that these quota limits only apply to the user’s own files and directories. They do not affect the overall disk usage of the system or other users.
To view the current quota limits for a user, you can use the quota command followed by the username or ID. This will display the user’s disk usage and quota limits.
By setting user quota limits, you can effectively manage the disk space usage on your Linux system and prevent individual users from consuming excessive resources.
Step 6: Monitoring User Quota Usage
Monitoring user quota usage is an essential task to ensure that users do not exceed their allocated disk space. Here are some methods to monitor user quota usage in Linux:
- Quota Report: The
repquotacommand provides a detailed report on user’s quota usage. It displays the current usage, allocated space, and percentage of disk space used by each user. - User Disk Usage: You can also use the
ducommand to check the disk space usage of specific directories or files owned by a user. This command can help identify large files or folders that may be consuming excessive disk space. - Email Notifications: Setting up email notifications for users when their quota usage exceeds a certain threshold can help them stay aware of their disk space consumption. You can configure email notifications using utilities like
quota_nldorquotaoff. - File System Monitoring: Monitoring tools like
monitornagioscan be configured to check user quota usage regularly and send alerts or notifications if the usage crosses a specified limit.
By regularly monitoring user quota usage, you can proactively manage disk space and prevent any issues related to exceeding allocated limits.
Question and answer:
What is user quota in Linux?
User quota in Linux refers to the limit set on disk usage by individual users. It allows system administrators to control the amount of disk space each user can consume.
How can I check my user quota in Linux?
To check your user quota in Linux, you can use the “quota” command. Simply open a terminal and type “quota” to see your current disk usage and limits.
Can I check the user quota for other users?
Yes, as a system administrator, you can check the user quota for other users on the system. You can use the “quota” command followed by the username to see their disk usage and limits.
Is it possible to change the user quota in Linux?
Yes, you can change the user quota in Linux. As a root user or system administrator, you can use the “edquota” command to edit the quota settings for a specific user. You can adjust the soft limit and hard limit values according to your requirements.
What happens if a user exceeds their quota in Linux?
If a user exceeds their quota in Linux, they will not be able to create or modify any files on the system. They will receive an error message indicating that they have exceeded their disk space limit. It is important for users to regularly check their disk usage and manage their files accordingly to avoid exceeding their quota.